Over recent years, design engineering departments within foundries, such as NovaCast in the UK, have increasingly become the home to various digital technologies ranging from CAD systems, 3D modelling and casting simulation to 3D printing.

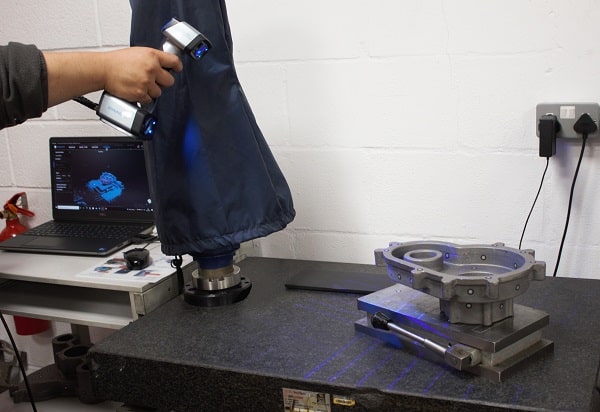
We take a closer look at the latest addition to the digital revolution; 3D scanning technology introduced at NovaCast’s Melksham foundry and reveal how it is being used as part of the design engineering and quality control processes.
What is 3D Scanning
3D scanners work with specialised software to create highly accurate three-dimensional representations of the target object. 3D scanners capture data from the object’s surface which allows the software to generate a digital image that can be measured, manipulated, or rotated to view the object from any angle.

There are many kinds of 3D scanners available, some are fixed while others are portable, some use lasers and others use structured light to assemble the geometric shape of the target object. Laser scanners use a laser probe to project a laser across the object’s surface while sensor cameras continuously record the changing distance and shape of the laser line. Although laser scanners produce quick results, structured light scanners are more accurate and have, as a result, become the standard for non-contact form capture in manufacturing.
How do structured light scanners work?
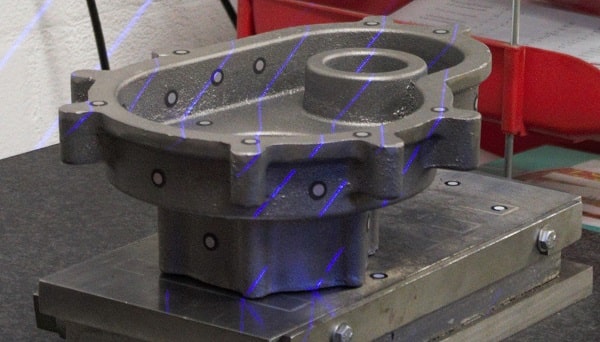
Triangulation lies at the heart of this scanning technology. A sensor projects a precise shifting fringe pattern across the object’s surface. Two cameras capture the surface geometry based on the pattern distortion. As the distance and angles between the sensor, camera and object are known, triangulation can be used to
capture Millions of 3D coordinate measurements, which are then processed by the associated software. The software transforms the data points into visible data that comprise an accurate, digital replica of the physical object.
Although structured light scanners originally used white light, those employed by NovaCast use blue LED light as this helps capture data on shinier and darker coloured surfaces while filtering out ambient light. The result is a clean, clear, precise data set with low noise.
Reverse engineering
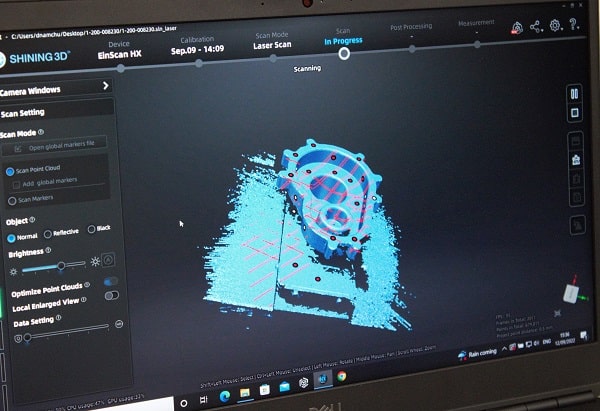
The Shining 3D EinScan HX system installed at NovaCast is a hand-held scanner that integrates blue LED with blue laser, a combination that allows a wide range of object sizes to be scanned while delivering exceptional image quality and accuracy. Geomatic Essential software processes the scanned 3D data and allows it to be edited using Point Cloud and Mesh Editing. This helps in the precise alignment of the scan and allows a cross section to be produced. The data is then passed through high quality automatic CAD conversion allowing the import of all geometry into a native CAD package providing a familiar modelling environment. Further refinement of the data in Solid Edge allows NovaCast to prepare it for 3D printing.
At NovaCast, the system is used primarily for reverse engineering applications. The ability to accurately reverse engineer existing castings is essential to any modern foundry. Reverse engineering could be required for a variety of reasons ranging from replication of an old casting where original patterns have been lost to improving mechanical performance or learning from an existing design to replicate or improve it. Whatever the reason, the foundry engineers must be able to accurately scan a casting and integrate the results with other digital design systems.
It is important to note that simply scanning an existing component is just the starting point in the reverse engineering process. Delivering an exact replica of an object is of little use if it is a worn part or contains casting defects or design flaws. With software processing and conversion to CAD modelling software, it is possible to modify designs, remove cast imperfections, and arrive at a perfect part that represents the design intent, and incorporates desirable performance enhancements.
The use of 3D scanning in Quality Control
Although originally purchased for its reverse engineering capabilities, NovaCast’s design engineers have found applications throughout the production process. They have increasingly taken a proactive role in project management, and active quality control throughout is an important part of that. 3D scanning of prototypes or manufactured parts can quickly identify if a discrepancy from the original CAD design files has emerged during manufacturing. This information can be used to make adjustments or modifications as required. This proactive approach saves wastage, time, and costs.
Quality departments have always referred back to CAD data to measure dimensional accuracy, often using sophisticated Coordinate Measuring Machines (CMM). Having the option to 3D scan items to check geometric accuracy very quickly and comprehensively is invaluable when checking complex cast components or the build-quality and accuracy of assemblies.
A digital revolution
The combined effect of digital technologies in foundries has transformed the way they operate. The design process is far more integrated into the manufacturing parts of the business, with feedback loops set up to ensure that decisions regarding design modifications, production efficiency and component performance are communicated throughout the business quickly. This cuts time out of the manufacturing process, improves product design and performance, and reduces costs, wastage, and impact on the environment.
For help and advice or to discuss your requirements, call a member of NovaCast’s team on +44 (0) 1225 707466, send us a message here or email sales@novacast.co.uk.